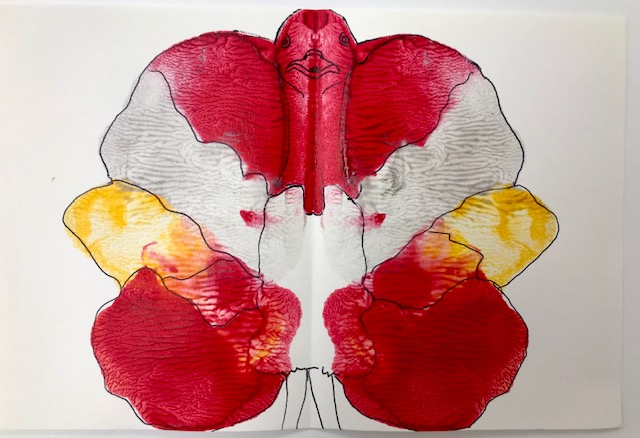
Paint Blot Creatures
This craft is a messy one but lots of fun. Be sure to have some newspaper down for a workspace or do it outside. All you will need beyond that is a black marker or pen, some cardstock or watercolor paper, and paint.
Fold your paper in half and open it back up. Add small drips of paint in a couple of different colors around the paper until you like how they are arranged. Once you are satisfied with the placement, fold the paper in half again along the crease already made. Rub on the outside of the paper to spread the paint around. Open it back up and observe your design. Do you see a creature or two in the different colors and shapes? Let your painting dry completely. Then, go back in with your marker or pen and outline your creatures! Add in any details you would like. This is a fun project to spark the imagination, and is fun for all ages!!
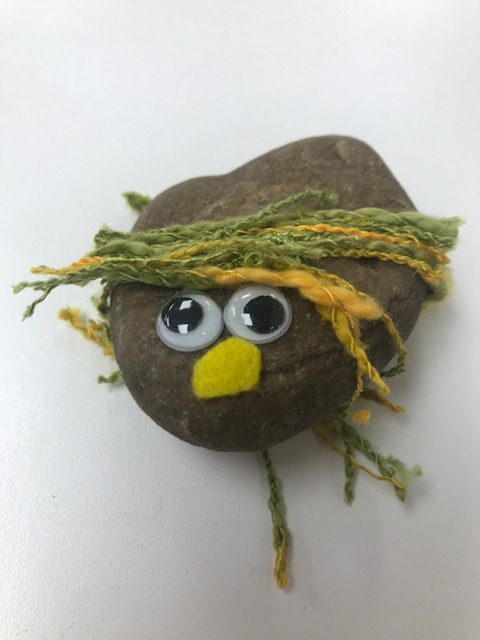
Rock Buddies
This week we are making these adorable rock buddies! All you will need is a rock, yarn, two googly eyes, some liquid glue, felt, and a scissor.
You can also decorate your rock with some markers or paint if you’d like, and can just draw on the eyes and nose.
Cut up your yarn into little pieces to make the hair. Then glue them onto the rock where you want them. Next glue on the two googly eyes and cut a nose out of felt. You can also use the felt to cut other shapes and glue on. Let your rock dry!!
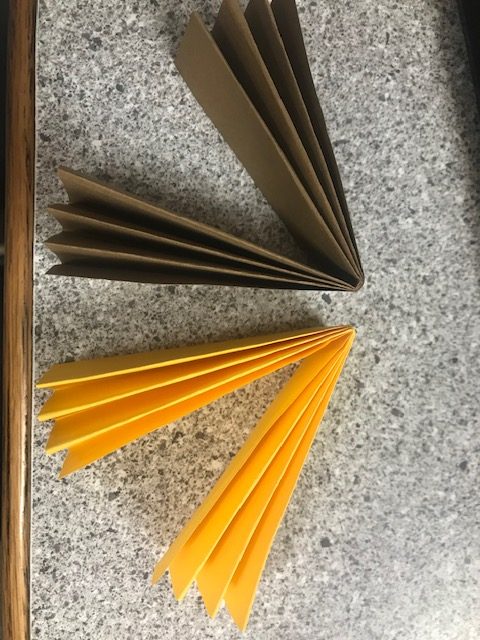
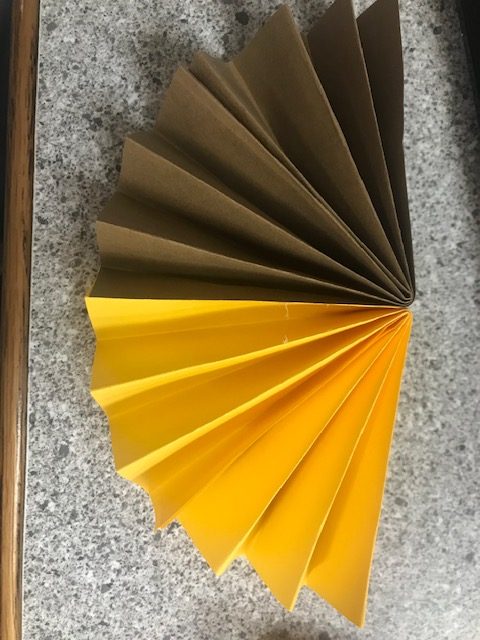
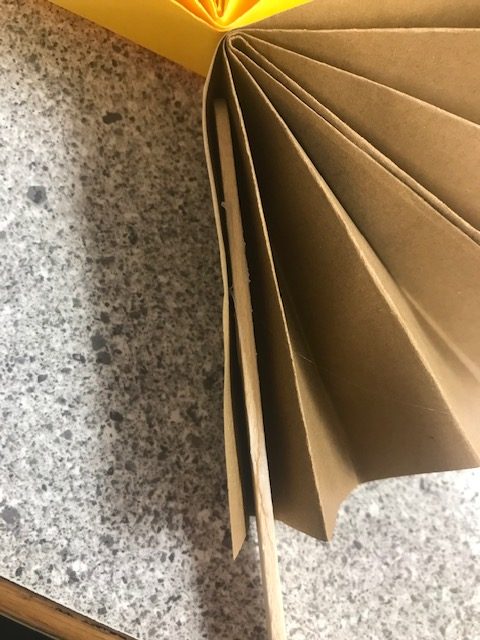
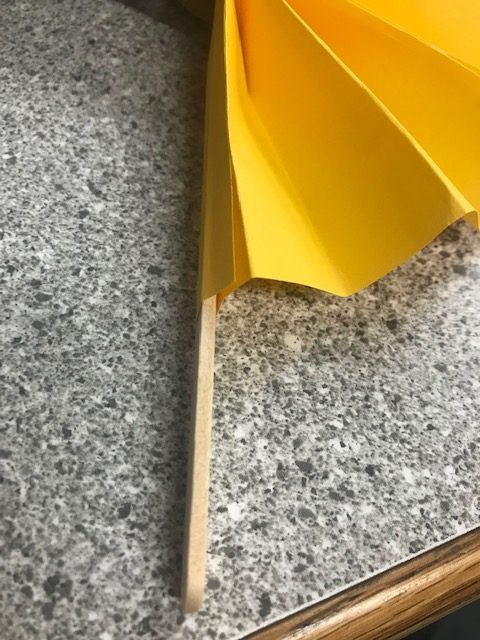
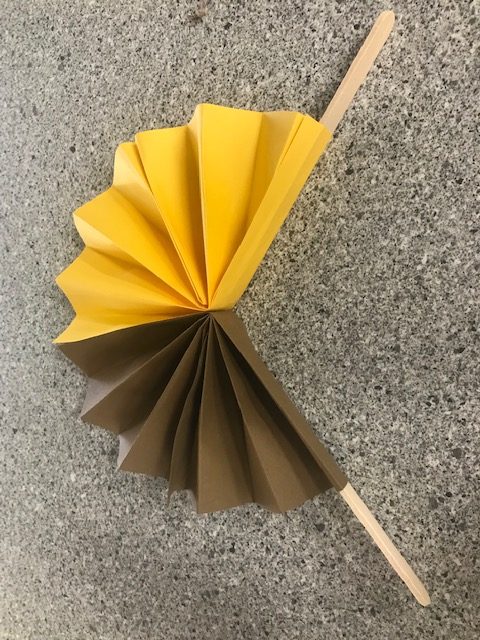
Paper Fans
Please note that we will be taking a break from the weekly take-n-make crafts for the month of May. This is so we can get ready for our summer reading program and find some creative new ideas! We will pick them back up again in June!! So stay tuned for our schedule of events!!
For this craft, you will need two square pieces of paper, two popsicle sticks, and glue.
First, decide if you would like to decorate your pieces of paper or draw designs on them. Then accordion fold each piece of paper. (See pictures for reference.) Once they are accordion folded, fold each piece in half. Glue them together so they make a half-circle. Then, add glue to both sides of a popsicle stick and tuck it into the nearest fold at the end. You can then glue the fold shut. You may need to hold it tight for a few seconds, along with any of the other seams you glued to be sure they are sealed shut. Then do the same on the other side. Now you can open and close your fan!
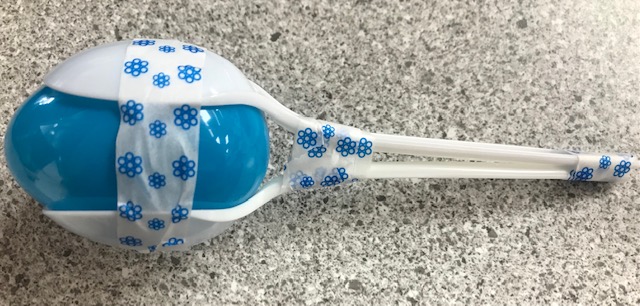
Egg Shakers
You will need 1 plastic egg (filled with either beads, rice, beans, or something that will make noise and hot glued shut), decorative tape, markers, and two plastic spoons.
Decorate your filled and sealed egg and spoons however you wish. . Then you will tape a spoon on either side of the egg, covering the glue. Add more tape on the handles. See the picture for reference. Enjoy your shaker!
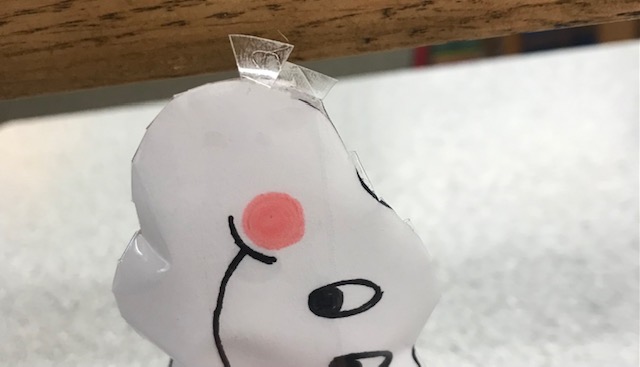
Cloud Squishy
You will need white paper, cotton, clear tape, a scissor and markers.
First, fold your white paper in half. Draw a cloud design on one half and cut it out so you have two.
Next, make a face for your cloud with the markers. Do this on the top cloud you cut out. Then you will tape over the first cloud with the clear tape so that there is tape hanging over all the edges. Cut the tape closer to the cloud so that your tape makes an outline of the paper cloud. It doesn’t have to be much, just enough tape all the way around, in your cloud shape, to fold over the cloud after the next step. You will then cut little slits in the tape all the way around. The trick is to make them close together and cut all the way to the paper edge. (This will make little strips of tape and help you fold them over the paper edge of the cloud, connecting the front and back of the cloud together.)
Here is how the little strips will look before being folded over.
Line up the duplicate cutout of the cloud with the first so that you can fold each small strip of tape over. Be sure to leave the top open though, for now, so we can add the cotton and fill the cloud. Make sure your remaining tape stays out of the way of the cotton as you stuff the cloud. Otherwise, it will not stick. So it is best to fill the cloud with small bits of cotton at a time. Once you have carefully stuffed the cloud, finish folding the last strips of tape over to seal it up. Enjoy your squishy!!!

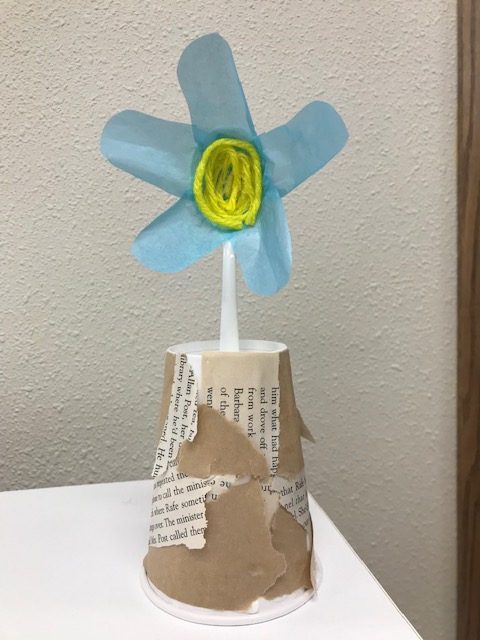
Spring Flowers
Before we move on from flowers, we are offering one last flower craft to remind us spring is arriving. For this one you will need a paper cup, a plastic spoon, liquid glue, yarn, old book pages, tissue paper, and a scissor. You can also choose to use paint, crayons, markers, etc. to further decorate your flower pot.
First, take your tissue paper and cut petal designs out so that you end up with 4-5 petals. Glue them onto the front of the spoon where it is concave). Then you will add glue to the center of the spoon and add your yarn in a spiral to create the flower center. Cut any excess yarn you don’t need.
While that dries, decorate your pot. The cup will be upside down. You can tear pieces of book pages to decorate your cup ( we also used our paper bags the take-n-makes come in), or if you want to paint or color it, feel free to do so! Once it is decorated, you will poke a small hole on the bottom of the cup in the center (which is now the top) and stick your spoon in there.
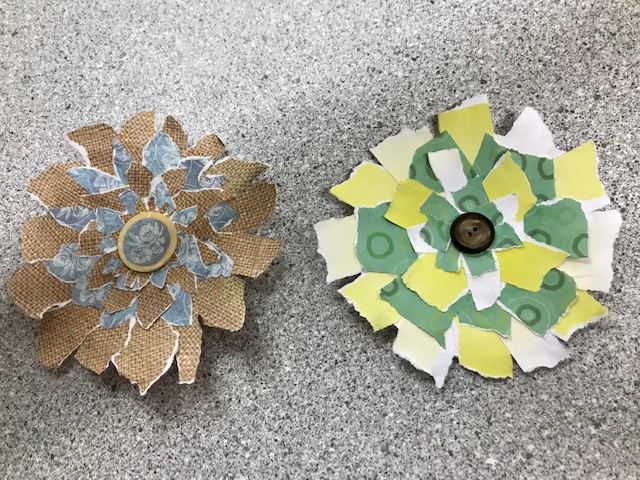
Paper Flowers
You will need a scissor, a paper circle template, colored paper in various patterns, and liquid glue to complete this project.
First, cut out your cardstock circle. Then you will take your colorful patterned paper and tear off petals. Glue the petals onto the cardstock in layers, starting on the outer edge of the circle and working your way towards the center. Included is a button to glue in the center, or you can cut out paper to use.
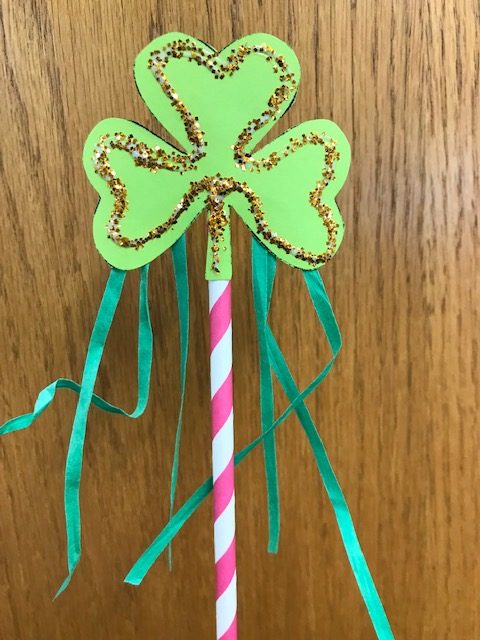
Shamrock Wands
You will need a paper straw, a shamrock cut out of green paper, streamer material (can be paper strips, string, ribbon, etc.), and glitter. You will need a scissor and liquid glue.
Cut your shamrock out and glue it to the top of your paper straw. Then cut the streamers and glue them on the back of the shamrock. Lastly, add glitter and let the wand dry.
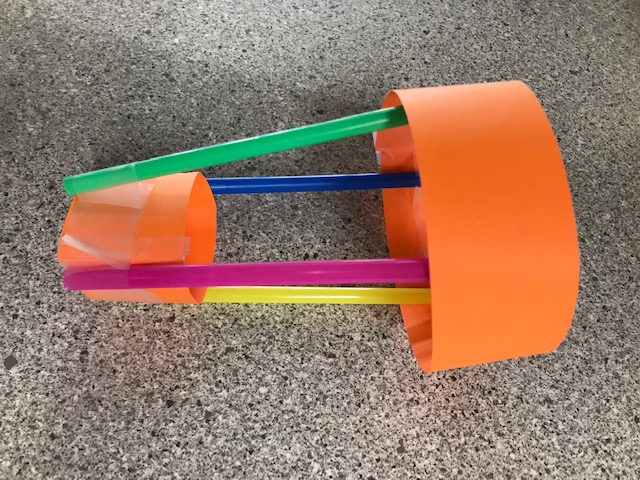
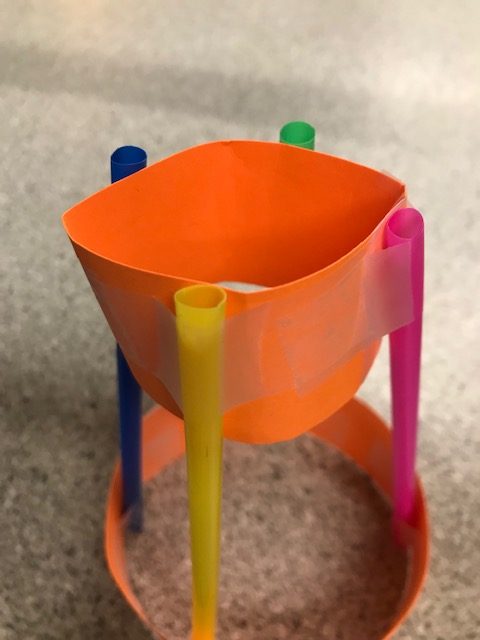
Straw Airplanes
This week we are making straw airplanes. All you will need is a regular-sized sheet of paper or cardstock, four straws, scissor, tape, and markers etc. to decorate.
First, you will take each strip of paper and decorate them however you wish. Then tape the ends together, forming a circle.
Next, take your 4 straws and cut the bendy part off of each one. Tape each straw, evenly spaced apart, to the inside of the bigger paper circle just as the picture shows.
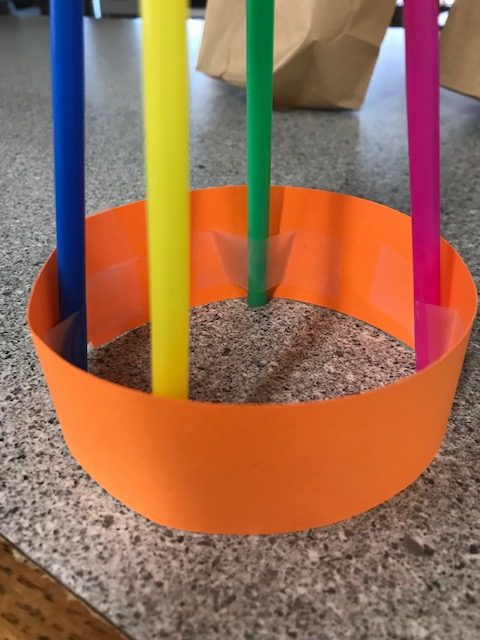
Then tape the straws to the outside of the smaller paper circle at the top, once again evenly spacing:
Your airplane is ready to fly! Which way does it fly the best? Does it fly better throwing it with the larger end forward, or the smaller end? Why do you think that is?